Monday 21 September 2015

THE GREAT COVER UP

Marjorie has lived up to all of my expectations. I have now covered about four hundred miles since she went for her MOT back in mid April, not that much really, but enough to know that she is completely reliable.

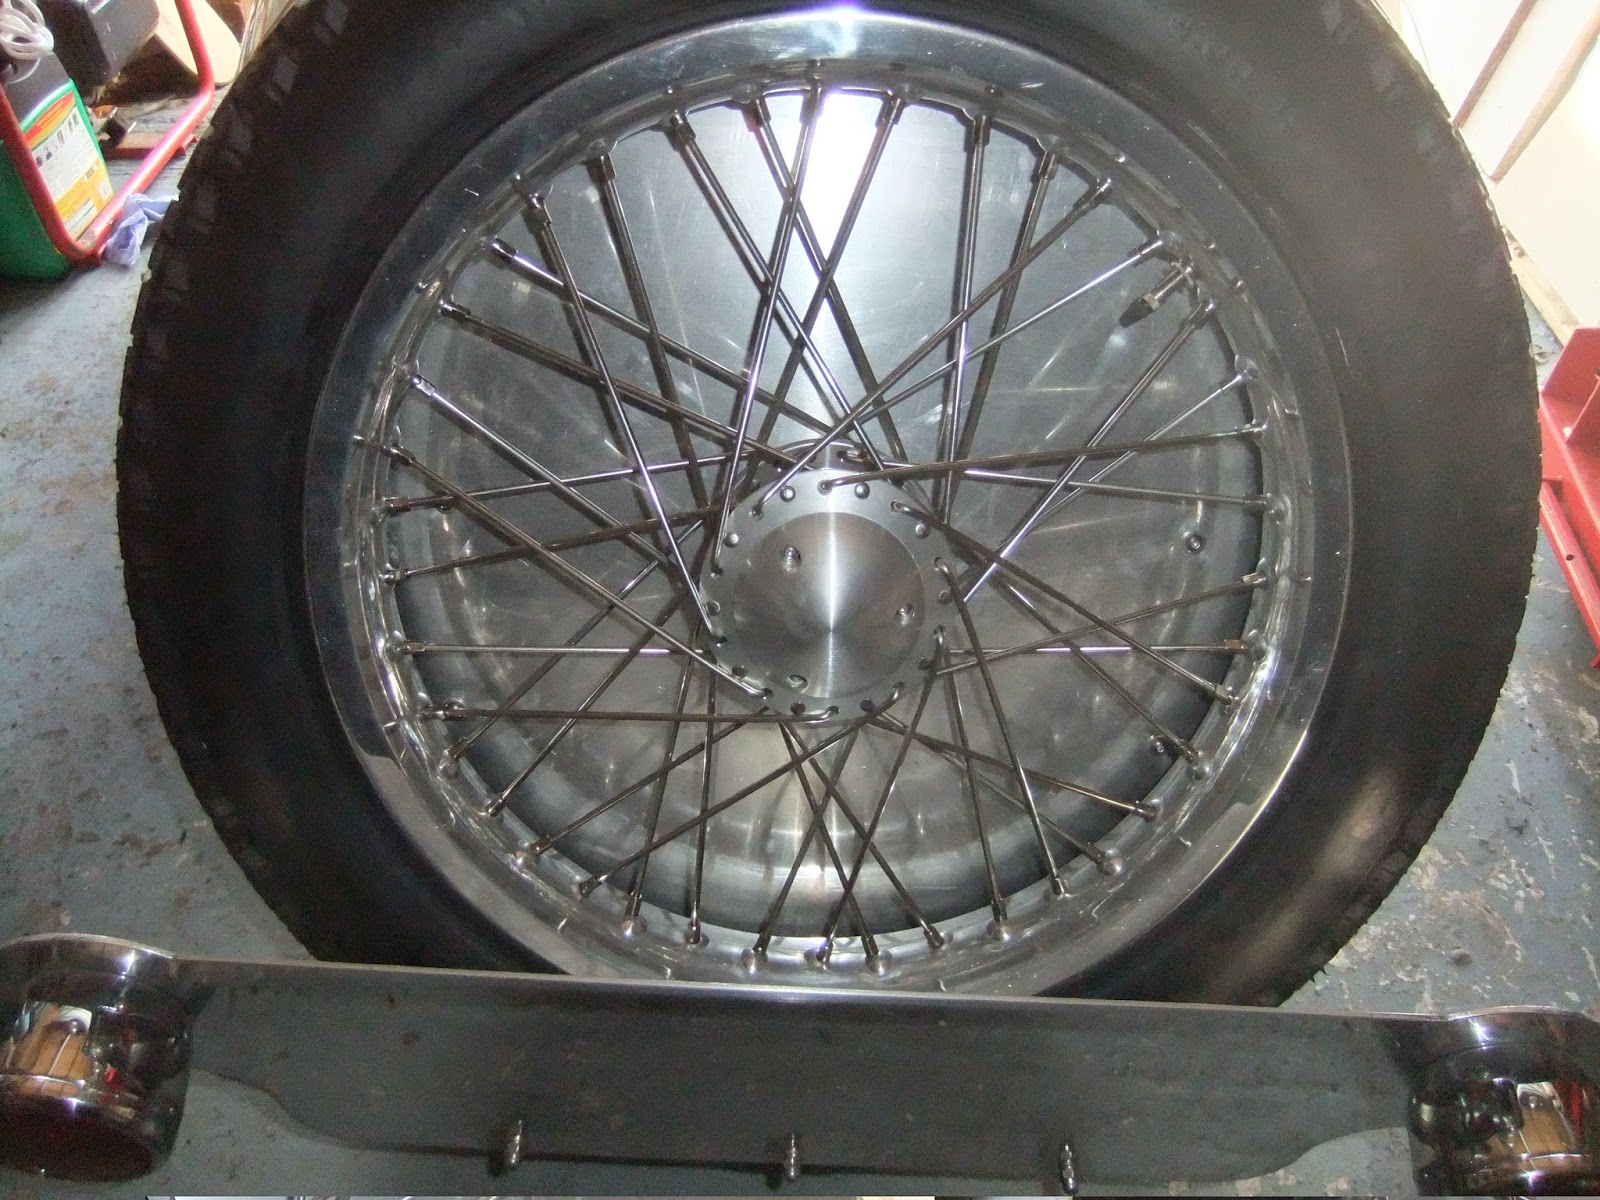
The sensitive steering issue was resolved by reducing the air pressure in the front tyres, just under 20psi and she now tracks steadily.

The other issue was 'To use the fuel pump, or not to use the fuel pump'. With a full tank there was sufficient head to give an adequate fuel supply at all throttle positions, without the use of the pump.  Anything less than half a tank. I needed the pump, otherwise the engine would fluff on full throttle. I nearly always prod the throttle pedal when changing down to smooth out the changes, but with clutch depressed on coming to a standstill there was always the possibility that the engine would cut out. The pump was definitely over fuelling, particularly the left carb, I think the fuel pressure would overcome the float pressure on the needle valve and flood the carb, if I remembered I would switch off the pump and hopefully remember to switch back on as I accelerated away.


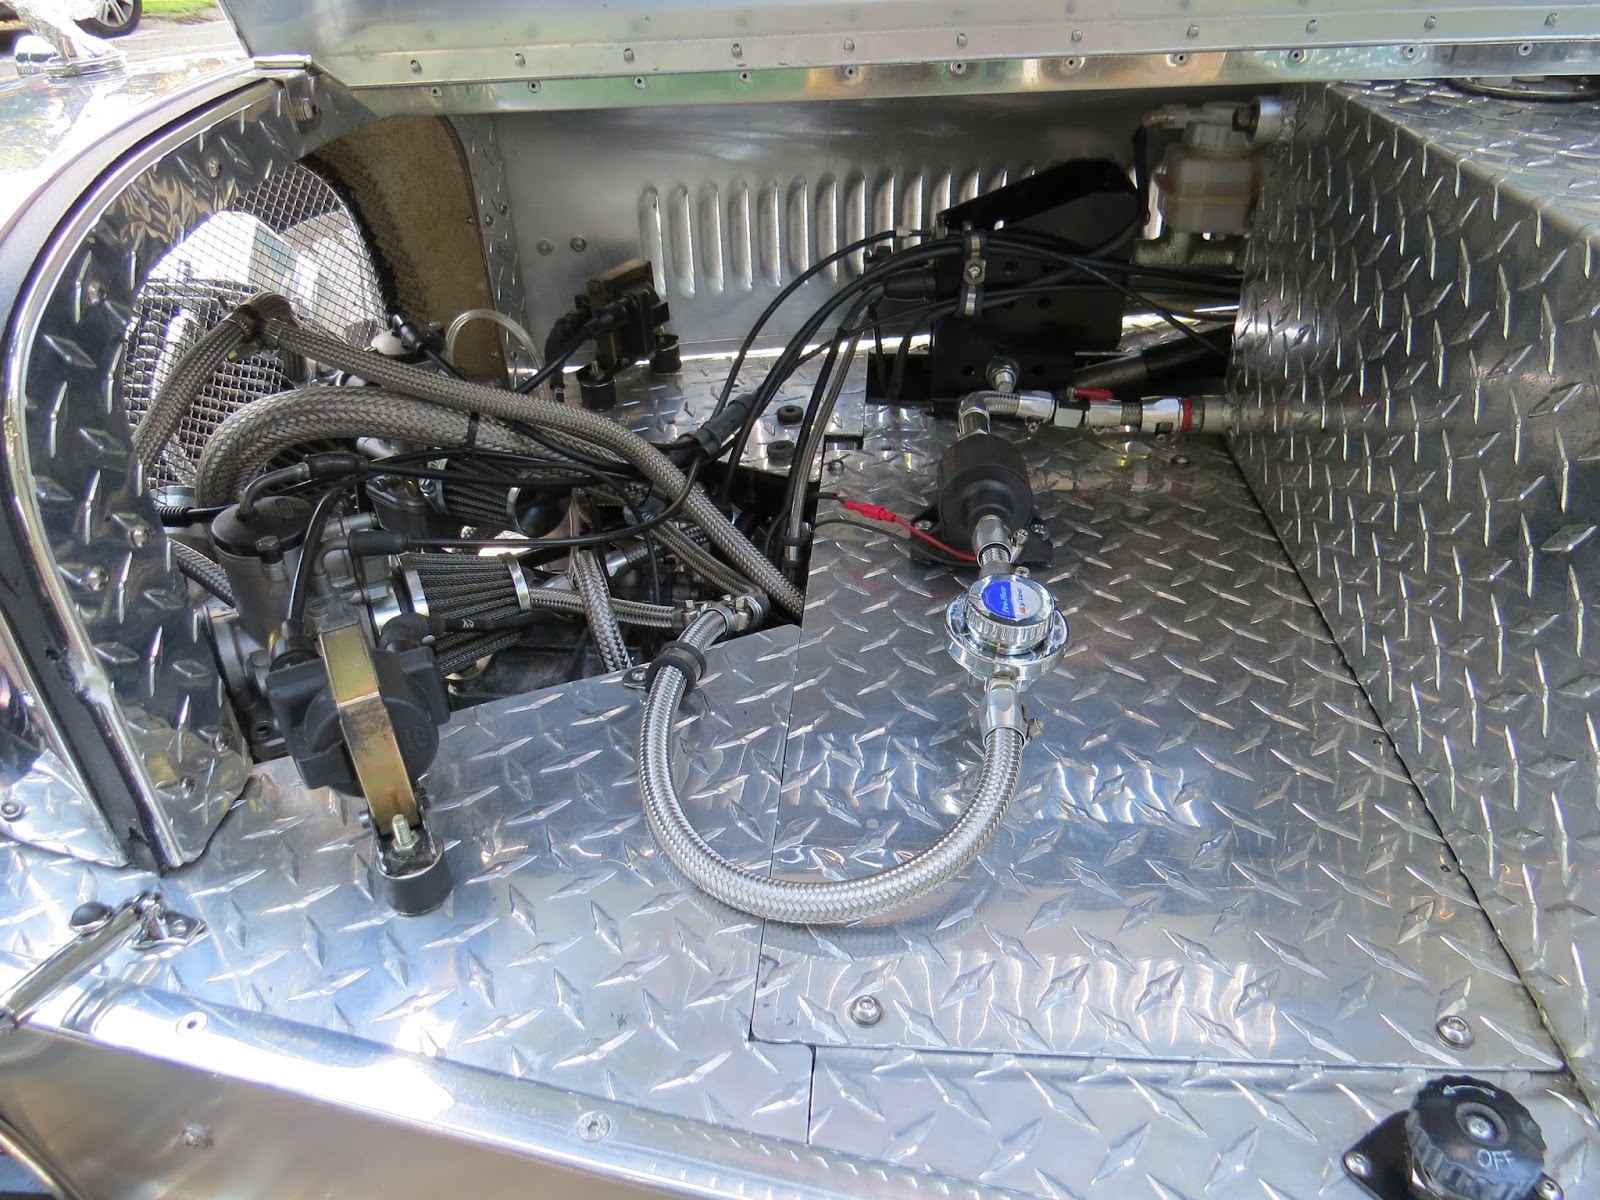
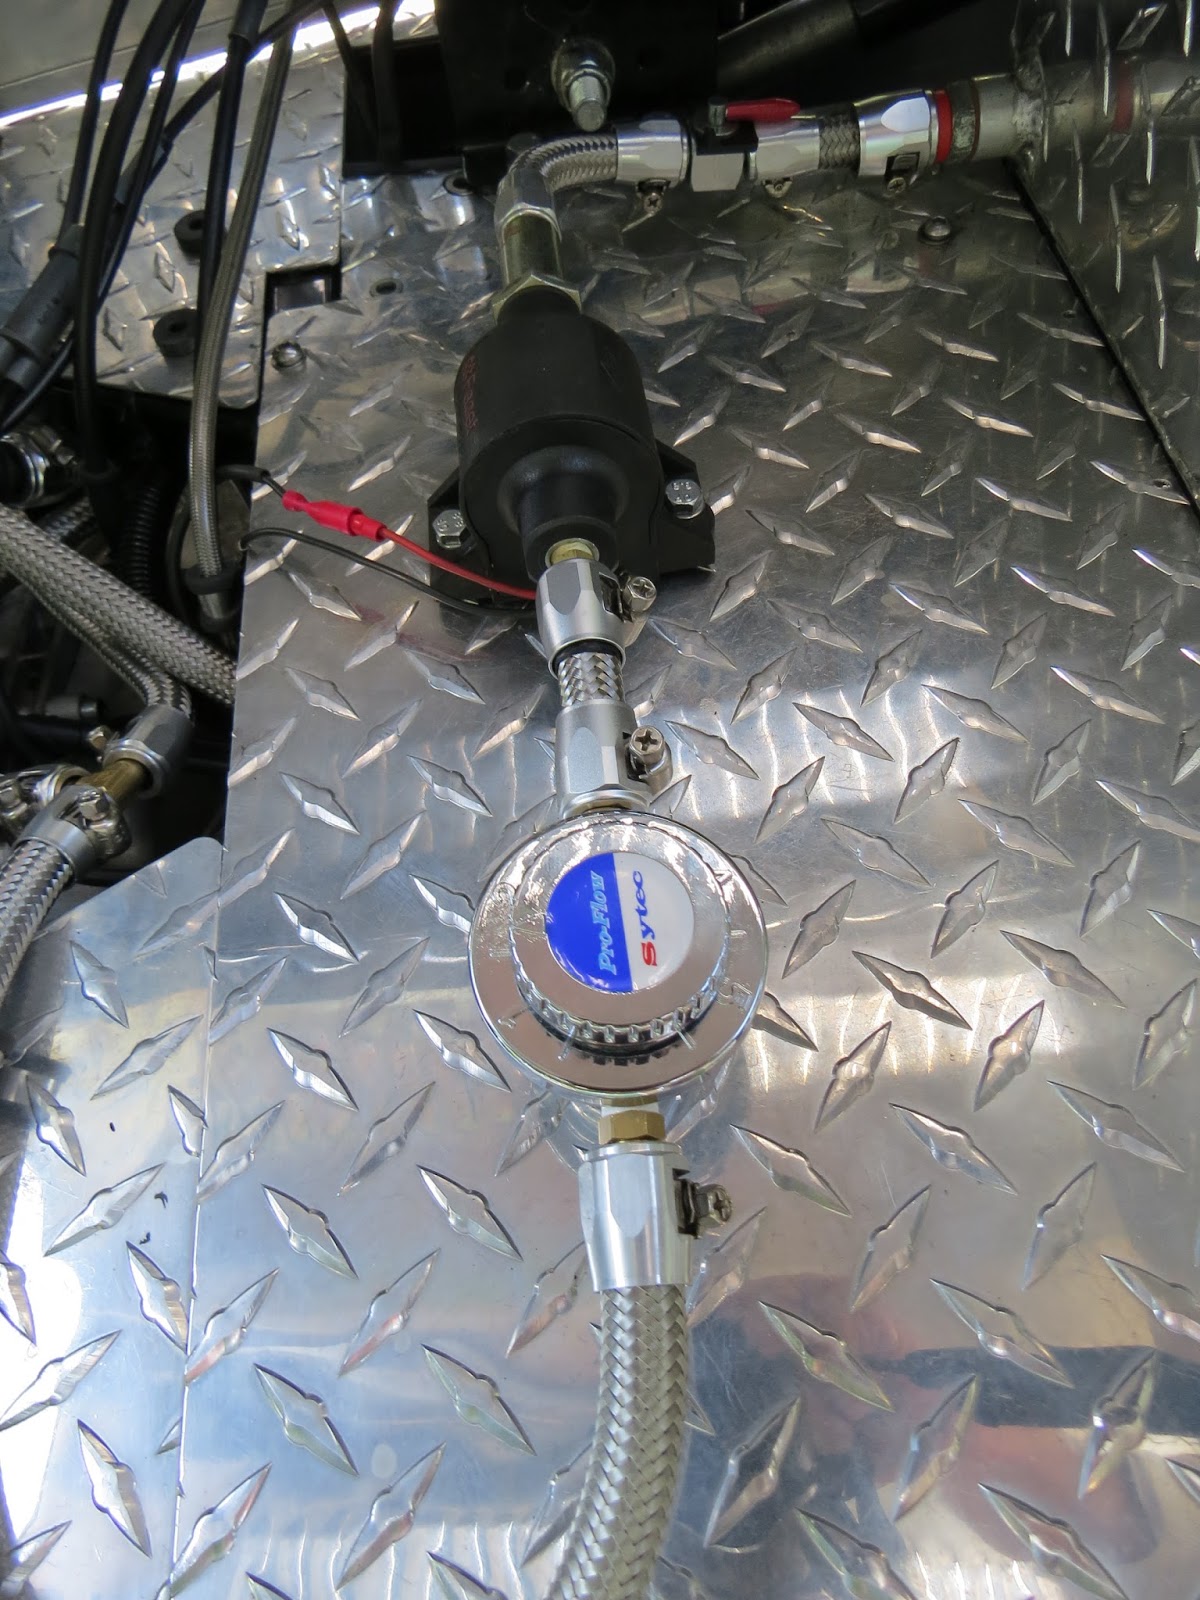
Now with the regulator fitted and set to 1.5 bar and the pump permanently switched on, absolutely no problem. No matter what speed I slow from, the engine settles into a steady tick over. Should I inadvertently stall the engine, the engine restarts immediately, it is now very reassuring in traffic and no sign of fuel starvation at continuous high speed. It took a bit of re-routing of the fuel line and the pump is now bolted down to the top of the electric box, but should I need to access the box it would only need the fuel line to be disconnected between the pump and the fuel tap.

So many people have said 'Don't paint her, she looks great as she is' I decided to take that advice, but instead to have a tourneau cover made.


Brendan at Oxted Trimmers discussed the best way to fit the cover and sent me away with a couple of dozen pegs that the 'lift the dot' fasteners would clip over and advise as to the position and spacing of the pegs.

I used making tape to to help me mark out the position and used riv-nuts to screw the pegs into the fibre glass and the ali side panels. A week or so later I drove Marjorie back over to Oxted and left her for the day, on my return there she sat with her cockpit tightly cocooned in black mohair.


The very next day I went to visit a chum to see his latest acquisition, a JBA Falcon Sport and was invited in for coffee when it started to rain. When eventually I left, after unzipping the drivers side of the cover, I had a lovely dry cockpit to slip into.

I am not sure how many fine, dry days are left to enjoy Marjorie this year, but at least if it does rain whilst we are out, the cockpit will be dry when it stops raining and it's time to go home.

Monday 20 July 2015

LEGAL AT LAST

TUESDAY 14TH JULY, was not a Red Letter Day, more a brown envelope one, that the postman pushed through the letter box. Very welcome it was though, as the envelope contained my new Registration Document upon which was the all important new, age related, N prefixed, registration number.

Without any delay I was down to the local car spares shop,excitedly waving my new pink document, at everyone I knew on the way. I soon returned with the newly made plates which just as quickly were attached to the front and rear of the car, The Marjorie plate, being placed on one side, just to be used at car shows and the like. There is much discussion as to whether vehicles registered as tricycles actually need to carry a front registration plate, but as my car has a panel that covers the steering rack, that is exactly the same size as a number plate, it looks a bit bare without a plate upon it and although I might get away with not displaying a plate, I think that the MARJORIE one would definitely cause a problem.

Whilst impatiently waiting for this all important document I had the front wheels properly tracked to the recommended 1.5 deg toe in on each wheel. I also made up, four 2in risers, in 1 x 1/4in mild steel strip, to fit between the top of the two rear shock absorbers and their brackets, thereby increasing the ground clearance at the rear to that at the front. Having fitted then and carried out a short illegal road test I was very happy with the outcome and was about to remove them for painting when I became legal. I decided to forget the painting, that could wait to the long winter months, instead lets do some proper, wind in the hair road testing and I headed out to my nearest stretch of de-restricted road, this was better, but the engine was still struggling once I got over 50MPH.


The next day I decided to pull the remainder of the fibre glass wadding from both exhaust cans and as before I wore mask and gloves whilst doing this. To be expected the resulting noise from the Brooklands cans was a real blat, but what a difference. The next time I did the same run, she blatted up through the gears and the only thing that stopped me from heading towards 70MPH was the lightness of the steering. I think in part, this is something that I will get used to, but I have been advised that maybe adjusting the tracking to a slight toe out will address this issue, we shall see, but what fun!!!!.

To my surprise, I was told on Friday last that there was to be a Classic Car and Bike show at the local Warlingham Rugby Club on Sunday. I didn't expect to be able to get there as we had chums coming for lunch, sadly for them, they were hideously delayed by an accident on the M23 and they only arrived in time for dinner. Happily this gave me a window to drive up in Marjorie and certainly if people didn't see me arriving they certainly heard me. This was the first show organised here and it was superb, so many cars, trucks and bike and such a variety.


Two of my photos shows a Cobra and an old Chrysler, they were parked side by side, what a contrast. There was always a crowd around Marjorie taking her photo and my day was made when a young lad said that 'my car was the coolest thing there'.

Monday 22 June 2015

ON SHOW

The Croydon Classic Car Show, organised by the Croydon Whitgift Rotary Club and held at the Rotary Field in Purley, Surrey on Sunday the 21st June, This date has been my aiming point, since I was invited to enter Marjorie over a year ago.

I thought I had plenty of time to finish the build, pass the MOT and MSVA tests and get Marjorie registered before the show. Having posted off all the required documentation to DVLA on May 5th and allowing the four to six weeks that DVLA said was the time required for registration, I thought 'no problem', how wrong I was. After three frustrating, weekly chase up calls, on the 19th June a letter dated the 10th arrived from DVLA, stating that to process my application they required my license fee. A positive move at last, but we are now entering the seventh week and obviously it is going to be a while before registration is complete.


However I was not going to let this situation stop me from driving a little over the one mile to the showground and at 9.30 am I was waved into my designated spot sandwiched between three Teal Bugatti's and a trio of Riley's


Jacquie did join me in Marjorie for the cavalcade around the ground, but thought she was better suited behind the wheel of a Lamborghini or one of the Buggatti's. I had during the last few weeks done several finishing touches, like the MARJORIE front number plate and the 'SuperSport' insignia at the rear. Marjorie was much admired, but the one comment that was repeated many time over, was, "Don't paint her, she looks great as she is". I think I will take that advise and save a chunk of money.


There was one other three wheeler, a Citroen engined Lomax, at the show and I was very impressed with a shortend MINI.


Jacquie, Duggie the dog and several chums enjoyed the very well organised event, as did many others, especially as the weather was much better than forcasted  Whilst we waited in the car to join the cavalcade, Jacquie took several short video clips, but most were over the 100MB maximum allowable size and as I have yet to learn how to edit a video, I have just loaded up this little clip as a taster.

 
With Duggie on Jacquie's lap we all drove the short trip home and Jacquie's response, when asked, was "That was fun, not at all scary" and Dug obviously enjoyed the wind in his hair experience, a very good end to an exciting first day out with Marjorie.

Saturday 16 May 2015

MARKING TIME

All of the paperwork has been collated, test and insurance certificates, registration douument for the donor bike, Certificate of Newness from Arthur, a Build Up Report, proof of identy, photograph, just to mention some of the paperwork required and it has now all been sent off to DVLA in Swansea. The waiting period to be issued with Registration documents, is four to six weeks and not quite 2 weeks into this period and I am getting impatient.


I removed that ugly grill the moment Marjorie was unloaded from Arthur's trailer and I handed it back to him. Since then Marjorie has been restored  to her pretest prettiness, with honky horn, spotlight and windscreens etc. being replaced. Before I refitted the luggage rack, I gave the hard wood supports fours coats of varnish and now they gleam, I also had some leather straps made up to give the illusion that the spare wheel and my wicker hamper were belted onto the car, rest assured, the hamper, like the spare wheel is securely fastened down, both belts just being for show.


From one of the Brookland silencers I pulled out about half of the fibre glass wadding.  I could see shards of glass glittering and dancing in the sunlight and was very glad I was wearing my face mask and gloves. I fitted that silencer onto the car and when I started her up I was surprised that the remaining Moto Guzzi silencer was still considerable louder than the Brookland can. I removed the can and pulled out more wadding, it looked  like, how you would expect witches hair to look like.There was now just about 1/4 of the original wadding left in the can. I refitted the silencer and again it was still quieter, but had a pleasant tone to it. I removed the same amount from the other silencer and when that was fitted a quick spin around the block proved that I still had full power for accelerating up the hill with only the slightest popping on the overrun and a small application of exhaust gloop around the connections with the side pipes, cured that completely.


I noticed during this run around the block that all of the instruments except the speedo were no longer correctly aligned. Off with the hatch at the back of the dashboard and I wiggled my fingers in to straighten and tighten then, the little gauges now all look right, but the tacho, although now firmly fixed, is still a degree or so out of alignment, I'm sure I'll be back behind the dash for something else before long and I will straighten it then. In the meantime the above photo is my driving view, hopefully it won't be much longer before I can really start to enjoy it.

Saturday 2 May 2015

MARJORIE STRIPPED FOR BATTLE

It was time to strip Marjorie of all her bling, off came the eagle mascot, horn, spotlight and headlight eyebrows, plus spare wheel, luggage rack, little Brooklands windscreens and the badges.

I then added the big safety grill that covers the whole front of the engine, and numerous bits of rubber trim and plastic nut and bolt covers, to ensure that there were no exposed sharp edges.


Arthur turned up bright and early on Thursday morning and we got Marjorie loaded on to the trailer and set off for the VOSA test center in Gillingham in Kent.


We arrived in plenty of time to unload and park Marjorie in a designated bay, before our scheduled 10 o'clock appointment. Arthur did a final check to ensure that we hadn't forgotten anything and his eagle eye spyed a bolt head that was missing a plastic cover, his large tool box provided the right size of plastic cover.


Adam the tester sauntered over and introduced himself and invited me to drive Marjorie over to one of the bays, One big problem, despite repeated jabs of the starter button, she wouldn't start and then we checked the fuel tap, it was turned off. This was not doing my nerves any good, but eventually we arrived in the designated bay.

All was going well until Adam asked me to operate the steering lock and it would not engage, a 'Show Stopper' apparently. Whilst Adam moved on to other areas, I removed the little panel behind the dashboard and realised that I hadn't tightened up the bolts that hold the ignition switch/lock onto the steering column. The heads of the bolts sheer off when fully tightened and I deliberately hadn't done so in case I had to remove the switch for one reason or another. With Arthur wriggling the steering wheel and me jiggling the switch/lock I was able to get the locking pin to engage with the slot in the column. I tightened the bolts and demonstrated to Adam that now the wheel locked when the key was removed and unlocked with the key in the ignition and Adam declared himself happy.

The only other problem was the upper straps to the seat belts, I had originally had them crossing over to the upper anchorage points, but Arthur said that on a previous test, the examiner had said that they could slip off the shoulder, so I had changed them around. Our tester said that such matters were at the discretion of each tester and after some deliberation he said he wanted them crossed over and when we done so, again he was happy.

At this point he said it was lunch time, but he was impressed with Arthur's build quality of the kit, welding etc. and I had done a proper job in putting it together and addressing all the safety issues. So far so good, just emission, brakes and noise to be tested.

After lunch it was a different bay and Adam waited whilst Marjorie warmed up before sticking a probe up her exhausts. Emission levels were fine. On the rolling road I had no idea what was going on, I just kept my eye on the computer screen and did as bidden. I had been worried about the handbrake test, but when I applied it as instructed, Marjorie shot back off the roller and Adam called out to let go, obviously handbrake was well up to it, as was the front brakes.

Just the noise test to go, I was asked to bring the revs up to three and half thousand revs, whilst Adam just stood and listened, no decibel meter required. A final nod from Adam and Marjorie had passed.


We loaded Marjorie back onto the trailer and I took a final photo of the huge and underused testing area, whilst Adam filled out the paperwork and came over and presented me with what looked just like the old MOT certificates, a shake of hands and we started our return journey back home. A celebratory glass beer before Arthur headed back to Sussex, where he would start to prepare the paperwork that I would need to get Marjorie registered and licenced, the final step to getting number plates made up and legally enjoying driving Marjorie down to a pub or two,

Sunday 19 April 2015

ARM RESTING

For some while I have been cutting lengths of 22mm pipe insulation to make arm rests for Marjorie. Good thing that they are only 92p for a metre length as it has taken four goes to get the right fit, that is, tucking in neatly at the front end and slipping in at the side of the back rest.

Having got them carved correctly, it was time to cover them and a metre of black leatherette fabric was ordered from an EBay supplier.


I covered the drivers side first, I used spray on impact adhesive to wrap the fabric around the foam, having first checked on an off-cut that the glue didn't melt the foam, I then trimmed and stuck down the ends by brushing on the adhesive and the finished item looked good, that was until I fitted it on the car. As I spread the foam roll to go over the side rail a large, irregular ridge of loose leatherette appeared along the top, disappointing!


OK, so it would probably be best to glue the fabric onto the foam with it in place on the car. With the fabric cut for the passenger side and lots of masking off, the glue was sprayed  and the fabric applied and smoothed down. I waited fifteen minutes or so before I removed the foam from the side of the car and then I sprayed the remainder of foam and fabric and tucked the fabric around all of the edges.


When I fitted the finished passenger side arm rest it looked just perfect, no wrinkles and neatly filled the gaps fore and aft. I am going to have to lash out another 92p for one more length of foam pipe insulation, at least I have got plenty of black leatherette fabric left over, but I am going to have to redo the drivers side.


There is a small quadrant of exposed fiber glass at each end of the dash board, above the new armrest, that still needs to be filled and I will cut a thin piece of board to fit this area and wrap it in the leather cloth to neatly trim this area.

Other jobs to be done, is to start preparing Marjorie for the MSVA test by removing all the bits and bobs, such as, spot light, honky horn and eagle mascot and fit the bull bars to the front.

Friday 17 April 2015

MOT'D

The first step towards registration has been achieved, Marjorie passed her MOT test with no problem.

Actually Marjorie didn't need to have a MOT test as the MSVA test is the big one, which if passed allows registration, but it is considered a good idea to have an MOT test first as it will highlight any potential problems.

The six and a half mile journey through busy South London roads was nerve racking, but was achieved with only one engine cut out whilst waiting at traffic lights. The next nerve racking time was driving the car over the pit and lining the rear wheel up with the very narrow centrally placed U channel, but the tester waved me on accurately and all was well.

I stopped on the way back at the Goat pub for a celebratory pint and to phone my long suffering wife with the good news and to take a couple of photos. First one off Marjorie basking in the sunshine in the rather scrubby car park and the second one of that all important piece of paper.


The MOT appointment nearly got cancelled, as on Wednesday, during a final drive around the block, the front brakes locked up again and I had to ask a local resident for a bucket of water to cool them down. My build buddy Pete had said previously that it shouldn't be necessary to skim the pads and Arthur came up with various suggestion to track down the problem. After a sleepless night and lots of head scratching, all it took was 1/8 of an inch adjustment to the length of the master cylinder actuator rod to allow it to fully retract into the cylinder when I took my foot of the brake pedal, problem solved. Hooray.

Tuesday 7 April 2015

SKIMMING THE SURFACE

I've sorted the brakes and it didn't take three hours, nothing like it.

Removing the pads was only possible by first unbolting the callipers from the support brackets and pulling the callipers complete with pads off the discs, it was easy then to remove the pads.

One by one I gripped them in the vice and applied an abrasive disc to the surface of each pad, which took only a few moments. When I put pads back in the callipers and bolted the callipers back on, the wheels spun freely, job done I thought. A couple of runs around the block and the brakes didn't lock on and the discs were only warm, but job only half done, for when I firmly pressed the brake pedal the back wheel locked up long before I felt the front brakes bite.

Not surprising really as my assault with the angle grinder and abrasive disc was a bit brutal. I put on the thinking cap and pondered how I could get a uniformly flat surface to each pad and eventually I got the answer.

The answer was my electric drill fitted in my cheapo drill stand and with a large router cutter fitted in the drill. I lightly oiled the the base of the drill stand so that the back of each disc would slide easily on it. Next stage was to lower the drill and cutter so that it touched the pad, I then slipped the pad out and lowered the drill and cutter by a tenth of a mil. With the drill revolving at its fastest speed I pushed a pad back under the cutter and it started to skim away the surface, I kept moving the pad around until all of the surface was moving freely under the spinning cutter.


There was an area of the pad that was still lower than the rest of the surface, so I went through the same procedure, lowering the cutter by a tenth of a mil. and after the pad had been under the cutter this time,  the whole surface was absolutely flat. The same procedure for the other three pads and then back in the callipers and back on the car and out for a test run. Perfect! I nearly hit the little Brooklands windscreen, full braking power restored and no over heated discs.

The only mistake I  made was when I took the photo I had my phone on video, at least I now know how to upload a video clip to the blog site and apologises for the appalling quality. Ohh, by the way, I wore a face mask all the time I was grinding and skimming the pads, I know they don't contain asbestos anymore, but I still didn't want to be breathing in any of that dust.


Friday 27 March 2015

ON GUARD

They're on at last, the mudguards that is. I collected them from Arthur, Monday week ago, the pair of universal, stainless, rear, bike mudguards, aluminium stays and a pair of steel brackets that Nigel the blacksmith had fabricated, to fit under the top of each guard.

The stays were easy to fit, one set just bolt onto the back of each hub carrier and the lower stays bolt onto the back edge of the calipers, by replacing a bolt with much longer one. The guards were much to big and would need a chunk cutting off, I placed one of the guards on the wheel with what I thought was sufficient overhang at the front and determined how much to remove. A cutting disc in the angle grinder made short work of that. The steel bracket I bolted on to the vertical stay, set the mudguard onto it and marked out the drill centers.


With the mudguard bolted onto the top steel brace, I turned my attention to fitting the lower brace to the guard, I think the intention was to just bolt the stay onto the side of the guard, but I thought the result would be a bit flimsy. I ordered through EBay a half metre of ally strip, 1in x 1/4in and did a bit of forging, trying to match the proper blacksmith's steel one. Blowtorch a hammer and my big vice and the angle grinder and the finished result wasn't far off the pattern.


 Again centers marked and drilled and the brackets attached to guards and stay, with a angled spacer in between and I finally had a pair of rigidly attached mudguards.


I also got to fit the old bike silencers and as I hoped, on a couple of circuits of the block, the engine was now pulling well with no hesitation up the hill, great. The look is compromised, but I will leave these pipes on for the MSVA test, but after the test I will have to experiment with the Brookland cans by gradually reducing the amount of stuffing until I get the same level of power. 


However by the end of the second circuit the car started to slowdown and eventually stalled as I tried to get back up my drive. Both front brakes were smoking and the brakes were fully locked on and the car was going nowhere. I got the brakes to free up after continuously splashing water onto them to cool them and was able to continue up to my garage. The front wheels had always taken some effort to turn them by hand whilst the car had been on the trestles. I assumed that when rolling, the pads would quickly be worn down, but obviously sufficient heat was being generated to gradually expand the discs and eventually lock the brakes up. I will have to remove the pads and grind them down to provide sufficient clearance to allow the wheels to spin freely, allow an hour, but will probably take three.

Friday 13 March 2015

MORE FIDDELING

The recent spell of good weather and the fact that she is on wheels, has allowed me to work on Marjorie outside in the sunshine.

When I launched Marjorie the long, side panels were only temporarily fitted, just in case I needed to get at anything, but once I was happy that everything seemed fine, I decided it was time to glue and rivet both side panels onto the chassis. First both panels had to come off and the chassis and the panel edges wiped down with white spirit to ensure the adhesive stuck properly. I had kept the tube of adhesive in doors to keep it warm and I was able to place two fine beads, either side of the rivet holes. The amount of glue was just right, with the minimum being expelled as the rivet gun pulled the panel and chassis together. The job was soon completed with very little mess to clean. Although I deployed my compressor and pneumatic rivet gun, for these little 3.2 rivets I found my old, hand pop riveter to be quicker.


Another job was to fit the seat belts, Arthur advised me as to what and where, and Stafford Vehicle Components provide me with a pair of static rear seat belts. It was only when I sat in the seats and adjusted the belts that I realised that long, over the shoulder straps, should cross over at the top of the back rest on way to their respective anchorage points. So it was off with the barrel back again to allow access and swap them over, it looks right now.


I said earlier that I was not happy with the engine, I hope I have identified the problem, if not yet fixed it. I had pulled out the old Moto Guzzi silencers to fit them for the MSVA test as I thought they would be quieter than the Brooklands. I chopped off two 4in lengths from each of the bikes old header pipes, to act as a reducer for the cars smaller side pipes. I got one silencer ready and popped it on in place of the Brooklands and started the engine and it actually sounded louder than my stuffed Brooklands silencer on the other side of the car.

Have I overstuffed the Brooklands? resulting into much back pressure, that might explain the loss of power as I climb a slight hill on my test runs around the block, she's fine on the level and downhill. Next job then, is to semi permanently attached the old bike silencers to the car and do a few runs around the block and see if she pulls better, if that is the case then I will have to start fishing some of that stuffing out of the Brookland silencers. Fingers crossed that it is as simple as that.

Sunday 1 March 2015

I'VE GOT IT COVERED

The hubs that is. I contacted a small firm of precision engineers, based in Sussex, they had originally modified my wheel hubs, before WheelWise laced the hubs and rims together. They quoted a week to make the three hub covers and true to their word they called me on Thursday to say they were ready, the next day I went and collected them. Superb, they fit perfectly and all I now need are the mudguards and stays and Arthur is getting that organised as I type


The other outstanding job was finding out why the speedometer wasn't working. I managed to wiggle my way in between pipes and cables, detach the cable and extract the worm drive from the gearbox, all fine there. Eventually I realised that the ferrule at the instrument end of the cable had worked loose, effectively shortening the length of the inner cable to the extent it wasn't locating in the square drive at the gearbox end.

I pushed the ferrule back on, temporally connected up the speedo and tried it out and it worked fine. I was able to do this as the reversing box has a central neutral position, with the engine running and in first gear the gearbox turned over, but drive wasn't passed onto the back wheel, allowing me to see the speedo working without leaving the garage. I fixed the speedo back into the dash and ticked another job of the task list. Just want to get the number plate to fill that space between the rear lights.

Tuesday 24 February 2015

FIDDELING AND FETTLING

Wow! I had to come down to earth after Marjorie's big day and get on with all the little jobs that became apparent after a quick run around the block.

But first thanks to Dejavw for his comment and Jacquie hopes that his reference to co-pilot relates to her, rather that five year old Emily. Also thanks to Dave from California and Sean for your good wishes.

First thing that needed attention was the tickover, I couldn't keep the engine running without choke. I ordered a pair of vacuum gauges, removed bonnet and engine cowling, connected the gauges and got the carbs balanced and ticking over at 1000RPM, but the gauges reacted differently as I opened the throttle, so I readjusted the tappets and now the gauges respond pretty much in the same way, hopefully that will stop the right cylinder running much hotter, indicated by the bluing of the header pipe. Engine not quite right yet, maybe the change of silencers and air filters requires the carbs to be re-jetted, a few more runs around the block required to determine.


Other jobs attended to was readjusting the gear linkage as initially I could only get 1st and just about 2nd gear. I moved the leaver back one spline on the shaft from the box and that made a big difference, but getting into 1st and and changing down was now difficult, fortunately every part of the linkage is adjustable so by shortening the final rod, I got it just right and now I can go up and down the box without a problem, for smooth down changes she still needs a blip of throttle,but it always did on the bike.

I have made basic adjustments to the steering; toe in and camber and Marjorie rolls much more freely now. The wheels looked nearly parallel whilst she was on the trestles, but tyre marks on the ground indicated I had far too much toe in. The steering wheel is now out of center and will have to be
adjusted accordingly.

By placing a chromed plastic edging strip around the rear I have tided up the back end, although It will have to come off when the barrel back, along with the other panels, are sent for spraying.


Next job is to find out why the speedo is not working and to glue and rivet the right side bottom panel in place. Plenty more jobs to do yet.

Sunday 8 February 2015

54321 LIFT OFF


At last, the LIFT OFF day for Marjorie Morgan arrived and thankfully it stayed more ore less dry for the 30 plus friends, family and neighbours who turned up to watch the event. Hot dogs and cava was served to keep everybody in a good mood


I was hoping to post the video on the blog, but apparently 100mb is the maximum size and my 10 minutes worth is over 2gb, so we will have to make do with the great photos taken by my chums, but I have managed to post the video onto YouTube, the link follows, for those you haven't got anything better to do.   https://www.youtube.com/watch?v=VnCo1_SWxwM&spfreload=10
If the link fails, then search for Launch of Mac's replica Morgan three wheeler.


The lifting off the trestles and lowering with the front wheel onto ramps went very smoothly, allowing room to extract the crane legs, there was some faffing about getting the crane out of the way before the bonnet could be lifted on and fastened. It was decided it would be safer to push Marjorie off the ramps rather than start the engine and with many hands pushing, after I remembered to fit the steering wheel, she slowly rolled off them and they were removed.


It was now crunch time, typical, it had started first prod of the button whilst on the trestles, but at this lower elevation it took several prods and I was beginning to feel rather foolish when at last to a cheer the engine roared to life. I gingerly engaged 1st gear slowly lifted the clutch to ensure that I wasn't in reverse and Marjorie rather reluctantly emerged from the garage. It was only after a couple of forward and reverse runs up and down the parking area, that I realised that I had left the handbrake on, silly me. After that getting Marjorie going was much easier and made even more fun with my 5 year old step granddaughter on board and Jacquie, my wife was also persuaded to climb aboard.


All went very well, until I tried to reverse back into the garage and the back end grounded out. It had been commented that the back end was much lower than the front and on a quick check underneath it was obvious that the rear tyre needed more air, but I will also need to adjust the rear springs to level it up, not a big problem and will soon be fixed.


Finally a few more photos of Marjorie on her big day