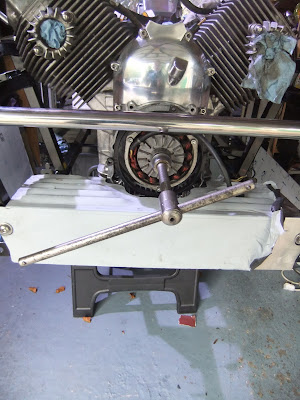
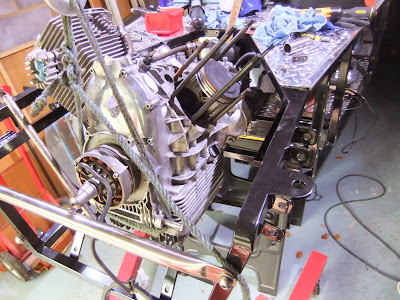
Now it was time to remove the heads and cylinders and the first difficulty appeared, the side chassis rails fouled access to the spark plugs and it would be necessary to remove these to get at one of the head nuts that lay beneath the spark plug. On the left side I could just slide in the plug socket and using the 1/2 in drive with a spanner I was able to loosen and then remove the plug. On the right side this wasn't possible and the engine would have to be tilted up at the front to access the plug.
I could now remove all the head nuts on the left side, one of which was an allen key headed nut that was hidden under a really tight cap, both of which took some serious shifting.
The rocker gear and push rods were lifted out and placed in an orderly manner on my bench. I decided to loosen all the accessible nuts on the right side before tilting the engine, so that I could safely use maximum leverage on the stubborn nuts. The engine crane was again deployed and with the weight of the engine taken, the front bolt was removed and the engine tilted just enough to remove the plug and nut from the right side. When it was time to lift off both heads and cylinders I realised that if I hadn't have tilted the engine I would not have been able to have got them off as they would also have fouled the chassis side rails, all worked out well in the end.
These items were laid out on my work bench, to await valve removal and de-oiling, but on initial inspection,the inside of the cylinders and the pistons looked to be score free and in good health.
With both pistons now exposed the engine was then gently lowered and re secured in the chassis. Next job is to drain the oil from the sump and then remove the sump cover, which will, along with the heads, cylinders and carbs be taken for professional cleaning, but that's enough for today.


Hi Mac,
ReplyDeleteAs a fellow MG3 builder I'm enjoying following your blog.
Mine is just about ready for its MSVA test but I've postponed it and insurance till Sprintime. I won't ever be driving it up here in a rural Northumberland winter. E-mail me at sales@backwoodsminiatures.com and I'll send you some photos of my MG3 - or register on the 3wheelerreplicas yahoo forum and check out my pics there in the photo album Petes MG3
Keep up the good work.
Pete McParlin