Thursday, 22 August 2013

TO POWDER OR NOT TO POWDER

I decided I might as well remove the swing arm from the chassis and prepare it for powder coating. The rubber boot at the gearbox end of the arm held the universal joint in place, the end of the joint can be seen protruding through the rear bulkhead, where eventually a bearing will join it to the new prop shaft. With the boot removed the joint slipped out, I taped over the pin bearings to stop  the dust and grit from entering and set too with the angle grinder and electric drill.


I used a non woven hard open sponge like disc on the grinder to remove 90% of the paint and a circular and cup wire brush on the drill to remove most of the rest. I bought in Aldi a spot blaster for £6.99 and thought I would use this with my little compressor to get into the difficult nooks and crannies. Well, various online forums said it was rubbish and for about the first time I must agree, up till that purchase any bit of kit that I have bought from Aldi has always done what was expected from it. With this bit of kit, unless I held the end right on the metal it only just began to remove the paint, for the 'nooks and crannies' situation, this was not possible and I had grit everywhere and the paint remained. In the end I resorted to a small chisel to scrape any remaining specs of paint, I also stripped the brake back plate in the same way.


The above shot shows the shiny, bare metal bits in the back of car on the way to the paint shop, where I was told that powder coating would ruin the three rubber oil seals and related bearings, (two supporting the swing arm pins and the other supports the UV joint) I looked puzzled until he said that baking the powder at 180 degrees would harden the rubber seal and any oil/grease in the bearings.

It was decided that rather than trying to remove the bearings, and damaging them in the process. It might be better to traditionally spray them with a two pack paint and in a weeks time I will collect the bits and hopefully they will look as good as new.

Sunday, 18 August 2013

A FITTING TIME

Swing arm and rear wheel are back in my home garage and the first thing I did was to offer up the swing arm to the chassis of the kit and yes, a lovely snug fit. However when I tried to screw in the pivot pins, they wouldn't. Arthur had welded in to the chassis 20mm threaded nuts that fit older swing arm pins and my 24mm ones just weren't going to screw in. Turns out that Moto Guzzi have, understandably,  made many changes over the years to the California, one of them being an increase of 4mm on the threaded section of the pins. Arthur's advice was to order the correctly sized ones and this I have done.

Also ordered were the dual shock absorbers from Hagon, which arrived within three days. High tensile nuts, bolts and washers, that were needed to locate the top end of the shocks. arrived in one day, Westfield Fasteners excelled themselves.


The swing arm minus the drive box is now temporally located using short lengths of 15mm copper tubing, one of the photos shows where the correct pin will eventually be screwed in. The top of the shocks have been approximately positioned using the large washers. In time the swing arm will need to be removed, shot blasted and powder coated before being permanently bolted up.


 I placed the rear wheel in the carrier on the back of the chassis, where the spare one was carried on the original Barrel Backs. This was a good place to start cleaning the hub, rim and spokes, after I first removed the brake disc. The spokes are stainless and a little wire brush on my Dremel got rid of the light crud, and various polishing heads also on the Dremel have got the rim back to a showroom shine. Paint was peeling from the hub and white aluminium oxide crystals had built up underneath. again, wire brush on Dremel worked between the spokes has removed the flaky paint and white crystals, but I now have to decide whether to repaint or lacquer, whatever I choose to do it will be tricky, spraying is out of the question as the spokes will get in the way, so hand brushing would appear to be the only realistic option, leave that one for another day.


Friday, 16 August 2013

THE STRIP BEGINS

The donor bike is in a borrowed garage a few miles away from home, as my garage is too full of kit car to be able to comfortably work on stripping the donor.


 I have now made a start and after removing the silencers and raising the bike and inch or two by placing some scrap timber under the centre stand and precariously pulling the bike over to the right I was able to wiggle the back wheel out to the left. This was only after I realised that a bolt that passed through the side of the swing and located the brake plate had to be unscrewed, the picture shows my allen key still protruding from the bolt head, having screwed it back in, on my six year older bike in France, you don't have to do this.


 Removing the swing arm, first necessitated a trip to Halfords to buy a substantially bigger socket than anything I had in my kit, 30mm to be precise, then I could unscrew the chrome end caps to the pins, the exposed end of the pins had an allen key socket in the ends, but try as I might I couldn't get a key to fit, 6mm was too small and the 8mm wouldn't fit, until I tapped in an 8mm bit that had a chamfer on it, what a tight fit!. The pins unscrewed easily enough and after a bit of a jiggle the swing arm complete with final drive box was on the floor alongside the bike.


A quick clean up and load it all into the back of the car to transport back home and that was enough for the day.

Tuesday, 6 August 2013

DONOR MOTO

Back home at last after nearly six weeks away, the newly installed irrigation system has kept the garden alive and my Morgan project was patiently awaiting some attention.


The last of the rivet holes have been drilled in the chassis, except in the floor panel, I need some extra muscle to help me turn the chassis over before I can attend to that, but in the meantime I located a 1995 California 1100 down in South Wales and last Saturday I boarded a Great Western train from Paddington to go and collect and ride the bike back home. I had been assured that she was in excellent mechanical order and she was, she also looked great, seems a shame to break her, but some of the leftovers, handlebar switch gear, for instance, will be used to bring my French bike up to date and the rest put on EBay


The ride back was smoothly uneventful, apart from a heavy shower of rain encountered between Bristol and Swindon, I checked the speedo regularly and continually had to reign her back in from 90 mph plus, proving that she is an ideal donor for the Morgan.

First job will be to removed back wheel and suspension, but first some gardening to be reluctantly attended to.


Thursday, 18 July 2013

MY BELLA DONNA

Our long stay in France is almost over and we soon move on to Spain for a week, but my love affair with my 24 year old old Moto Guzzi California 3 is still hot.

The old beauty didn't miss a beat during our two week tour across Italy and into Austria, the roads and scenery are spectacular, the high point literally was the Grossglockner pass, on the way down from which the temperature dropped to freezing point and we were in a white out from blown snow. Jacquie spent a couple of days in the saddle with me, otherwise she rode shotgun with Lynne and the two dogs in Lynne's convertible. On the way back along an Italian autostrada the old girl got up to 115 mph, but Jacquie was not on the back then.


Since arriving back at our friends home in the mountains north of Nice, the oil and filter have been changed, not as simple as it might sound as the sump has to be dropped to get to the oil filter. I remembered that after removing the 14 socket headed screws around the sump there is still 4 bolts at either end to be removed. The first time I did this job I ended clouting the sump with a rubber mallet with not a sign of movement until I discovered these tucked away bolts.

The rocker covers were also removed and the tappets adjusted, it was sounding a bit clattery. The Guzzi is a really easy bike to work on and is pretty much bomb proof, on one trip back from Italy I had to crash change the gears as the clutch cable was steadily pulling out from the nipple at the handle bar end. I only used the clutch when I actually had to stop for tolls and traffic lights and by the time I got back home there was only three strands of wire still soldered into the nipple, but the gearbox didn't complain. I now have a spare cable taped alongside, just in case.

I will soon be looking for a donor Moto Guzzi for the Morgan project, it will probably be a California, but a much later model. My fingers are getting itchy waiting to get back to work and make the best of the warm weather.

Saturday, 15 June 2013

WE DRILL DRILL DRILL

SATURDAY 15TH JUNE 2013

Thank you Carol (a canal chum) for your comment and to set your mind and any other concerned mind at rest, the aluminium panels are covered in a plastic film, to help prevent them from getting scratched. Before final assembly the plastic will be peeled of and the aluminium polished, the plan is for the top side to be painted Morgan Red and the bottom half to be lovely and shiny, thus satisfying my need to always be polishing something.

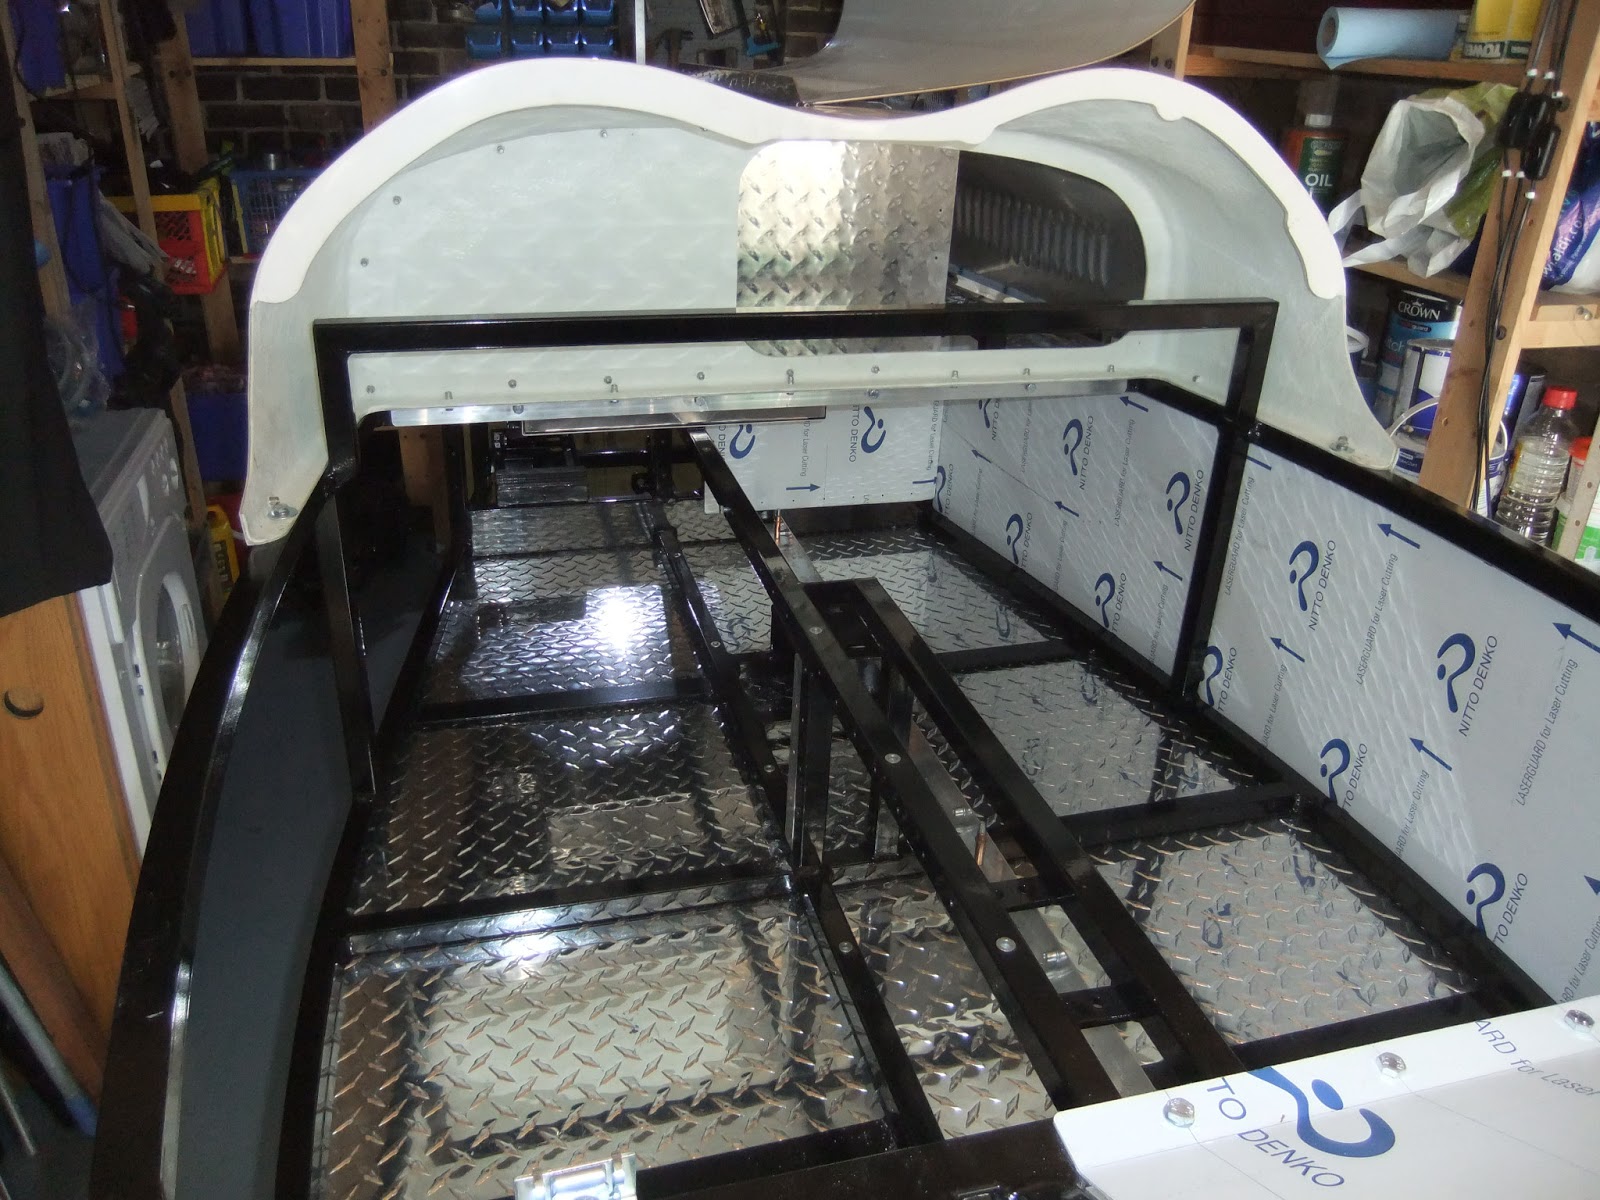
Almost all the rivet holes on the left side have been drilled and the panels removed exposing the transmission tunnel and most of the compartment where the single rear wheel will be attached. I used a 10mm drill with the shaft end ground down to fit a hand held chuck and set too with the laborious job of cleaning up all the drill holes to remove any swarf and ensure a flush fit when it is time to bond and rivet the panels to the chassis.


 All of the ali panels are a perfect fit, with the exception of a small section of the large floor panel, which for about 18 in.at the rear,m projected beyond the chassis rail by no more than an 1/8 in. I carefully marked the overlap, dropped the panel in that area, clamped it with 2 in.blocks to the chassis rail, so that I had room to grind without damaging the chassis and with my angle grinder, dreadnought file and emery paper, produced a smooth flush edge. Almost certainly I will have to do the same on the right when I get to it.

The bonnet halves are formed, but not a perfect fit to the nose cone and scuttle, with a bit of extra bending here and there the left half now sits fairly accurately and once the rubber strip cushion  and spring bonnet catches are fitted it should be fine.


That's it for now, all tools tidied up, drilling and grinding  swarf vacuumed away and off to France for a few weeks to ride my Moto Guzzi amongst other enjoyable holiday pursuits and on my return I will start on the right side, see you then.

Saturday, 8 June 2013

IT'S ARRIVED

SATURDAY 8TH JUNE 2013

Not quite the end of the month, but Tuesday 4th of June was delivery day and just after three pm. Arthur and two chums came up the drive in a white van drawing a trailer with my kit strapped securely to it.


My friend, Colin had come to help with the unloading and four of us comfortable lifted it from the trailer onto my trestles. It looks as if I should have enough working room, but I will need to turn it around when it is time to fit the front suspension, but that's some while away.


All the aluminium bulkheads and panels have been loosely fitted, with the odd pop rivet or bolt here, but still requiring me to drill a myriad holes in various sizes. The fibre glass sections look to be of superb quality, very substantial and rigid.


I have now drilled all the rivet holes in the left hand bottom panel and it is held in place by 'cleco' pins, fitted to alternative rivet holes. Theses are a secure but temporary form of rivet as none of the panels should be bonded and riveted permanently in place until all mechanical, electrical, fuel and braking systems have been installed tested, way to go yet!