Monday, 14 October 2013

IT FITS

What service, the day after the order being placed, the tyre ordered from Longstone Classic Tyres was delivered on Thursday. Complete with inner tube and rim tape brilliant. It is much slimmer than the Bridgestone Battleaxe bike tyre, but with the flat profile more rubber will actually be in contact with the tarmac. Just need to get it all down to the fitter sometime and then I will Ebay the old, but good condition Bridgestone bike tyre


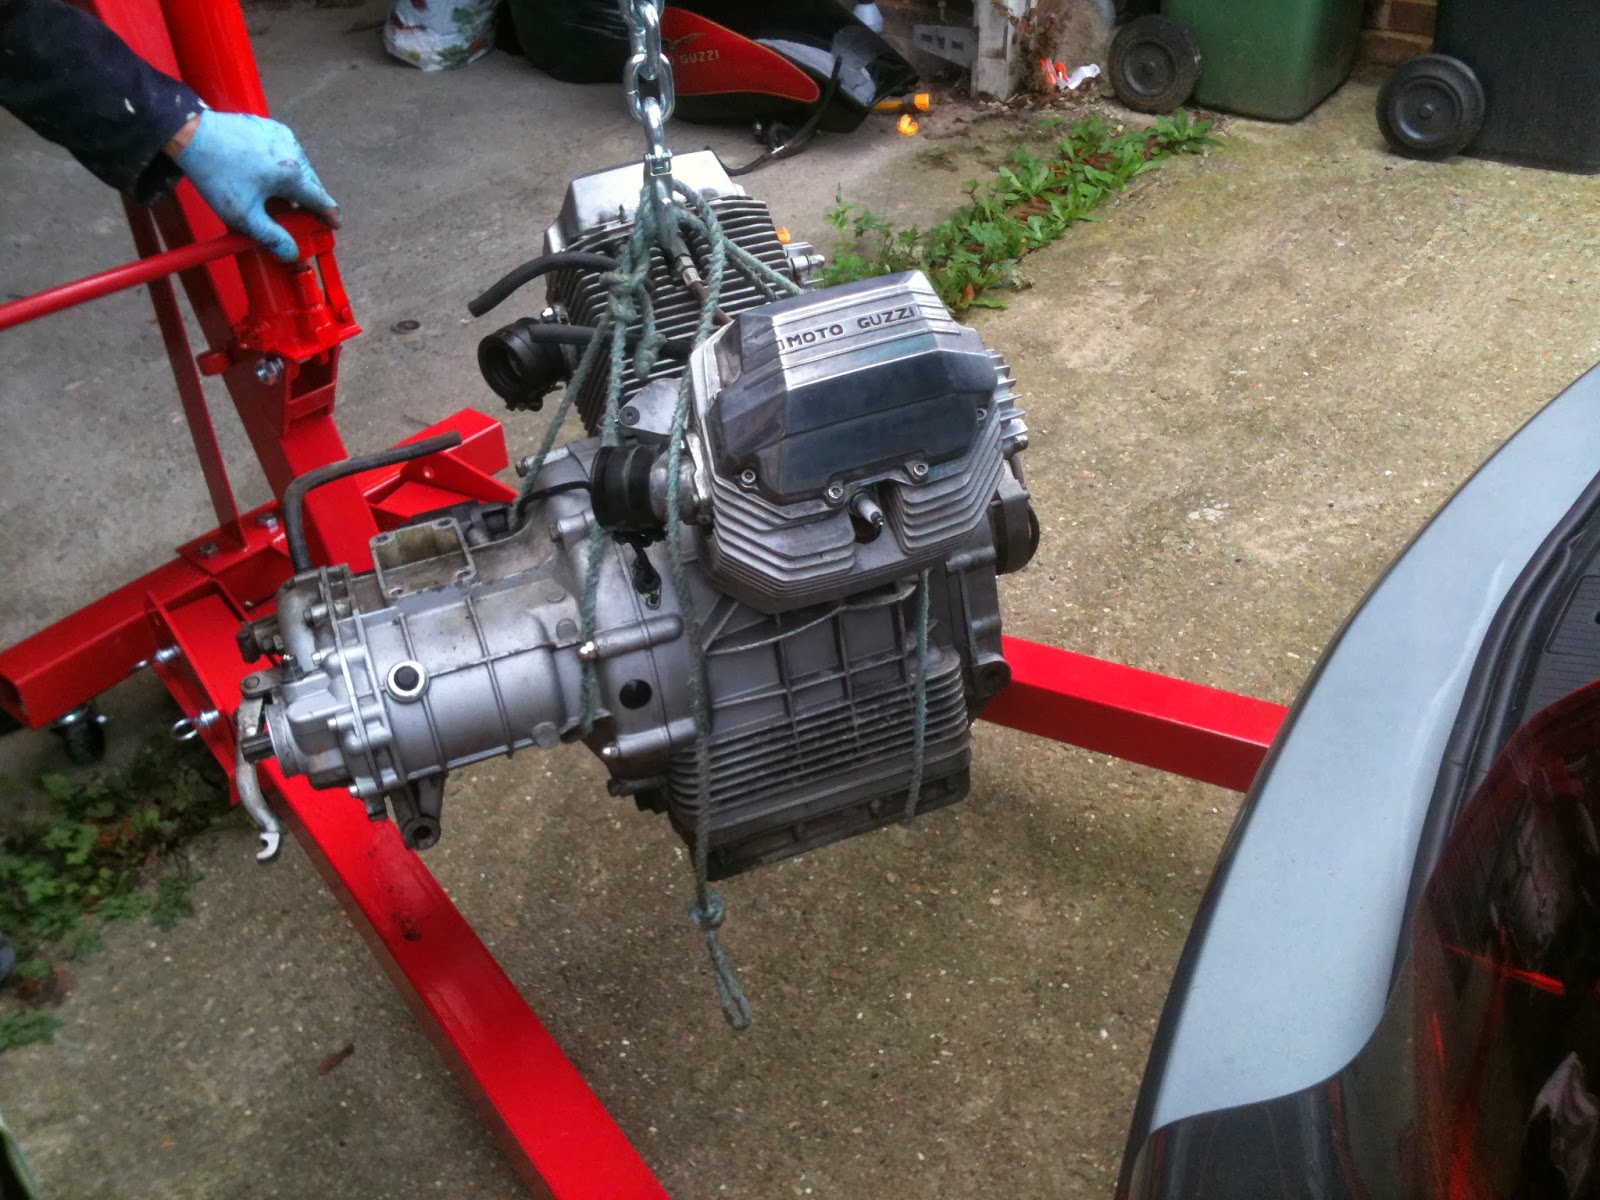
Early last Friday morning the crane was unloaded from the car and bolted back together again and the engine was easily lifted out of the car and deposited in the front of the garage. There would be no time to do anything more until Monday, but that would come around soon enough.


First job on Monday was to suspend the engine over the oil tray and give it a good wash with paraffin, a following wipe down, showed that like the rear wheel hub, there are areas where the paint has blistered off, mainly on the crank case, cylinder and head. I will have to devise a plan, as sadly it is not presentable in its existing state, but plenty of time for that.


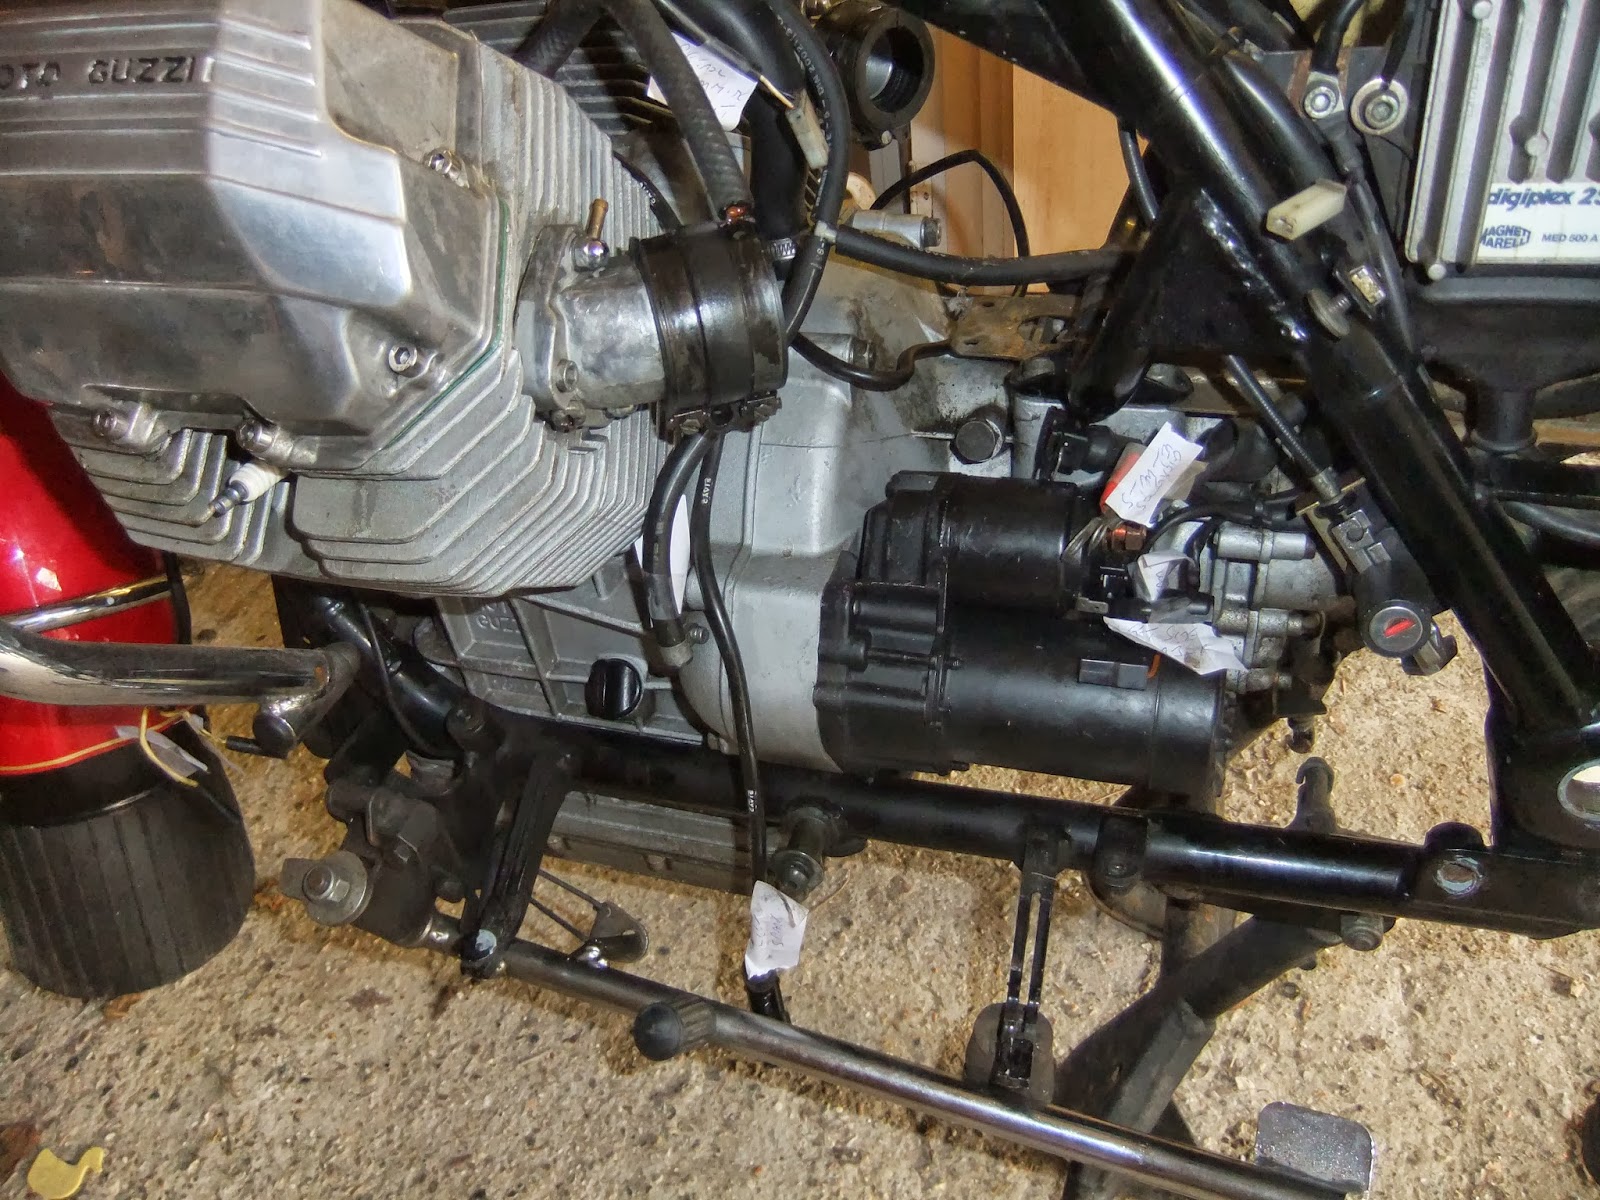
What I did next was to trial fit the engine to the chassis. The crane gently lowered the engine into place and the front bolt slipped in easily, a little lower and the rear bolt holes were lined up. The right hand hole in the chassis had to be opened up a tad with a file before the bolt could be persuaded to go all the way through, IT FITS hooray. The bike bolts are too long, but I have checked that 150 and 220 mm long x 12mm high tensile bolts are available and when I know what other bolts I will need for the front suspension, I will order these. In the meantime the engine can stay there whilst other jobs are attended to,

Friday, 11 October 2013

I LOVE IT WHEN A PLAN COMES TOGETHER

With only a bit of jangling the hoist was transferred to Reigate where I immediately reassembled it. I had given the job of removing the engine from the bike frame some considerable thought,  the workshop manual says that a special frame should be placed under the engine to support it, I didn't have one of those, but four piles of three bricks and a plank of wood was half an inch higher than the underside of the sump.


 With Jacquie on hand to steady things and to take photos the crane was positioned over the rear of the bike and after passing a rope twice around the frame the jack handle was pumped and the whole bike lifted just sufficiently to build the brick and wood platform under the sump. The bike was lowered and the platform took the weight of the bike. There was only two long engine bolts and four allen screws to be undone and after the bolts had been pushed out theoretically the engine was free, but the bottom frame rails needed to be persuaded to part company with the main frame and a few clouts with my hide mallet did the job.


After some vigorous pumping the bike separated from the engine until Jacquie called out there was a couple of things still attached, the linkage between foot brake and master cylinder was quickly detached and the cable from the prop stand was also released. The rear of the bike was hoisted until it cleared the engine and then it was swung side ways and lowered. The bottom frame rails were unbolted from the engine and pulled away, to be refitted to the bike later.


The rope was secured around the engine and the crane hooked up to it, a couple of adjustments of the rope to get the engine to hang square and it was raised just enough to allow it to be swung around and rolled out to the back of the car whence it was gently lowered into the car.


The bottom rails were reattached to the main frame which would allow what little remained of the bike to stand firmly and securely on its center stand. The crane was again dismantled and stowed along side the engine in the back of the car ready for taking it all back to my home garage. I was left feeling pretty smug that my forward planning had allowed the job to go perfectly, but then again I've got to get the engine it into car yet.

Wednesday, 9 October 2013

PAINT MY WHEEL

I took advantage of the remarkable warm weather to paint the hub of the rear wheel. Hammorite, smooth, aluminium paint was to be used and after a final rub and wipe down I started to apply it with a small brush. It went on very well and I managed to keep the spokes reasonable free of paint.


The photos were taken after the first coat and part way through and the finish was better than I expected, although I did give it a second coat to be on the safe side. The hub will never be seen as it is tucked away under the rear end, but like the swing arm, I feel the need for it all to look good.

The rear tyre posed a bigger problem, the existing, rounded tread bike tyre needs to be replaced with a flat profile car tyre.  My wheel is 17 in. and the recommended Avon sidecar tyre requires an 18 in. wheel, this would mean having my wheel rebuilt with a new rim and spokes at a cost of nearly £300.  However some extensive web searching came up with  
www.longstonetyres.co.uk  They have a new cross ply tyre of the right size 400/425x17 with all the correct markings required by MSVA (Motorcycle Single Vehicle approval). This tyre is actually designed for the old Austin Ruby car, but I asked Arthur, the manufacturer of my kit, to confirm it's suitability and he has given the thumbs up. The new tyre should arrive in a couple of days.


What has arrived is my engine crane. I don't know how the delivery guy got it to my front door as one box weighed over 50 kilos and the smaller one 16 kilos. I put it on my trolley and took it back to my garage and assembled it. I checked it out before partially de-assembling it and loading it, with some difficulty into the back of the car, for transporting over to Reigate tomorrow where it will be put to work removing the engine from the bike.

Sunday, 6 October 2013

TURVEY TOPSY

Good friends Lorna and Martin arrived on Thursday evening for dinner, in fact we were expecting them on Friday, but fortunately a call from Lorna at 6pm on Thursday to confirm time of arrival made us realise our mistake. Jacquie pulled out all the stops and conjured up a very tasty meal, but as it was getting dark when they arrived, they where immediately pressed into action.


This time the chassis not only had to be flipped up the right way, but turned around so that the front of the car is at the front of the garage, leaving more room for fitting the front suspension and engine. No problems, but it did seem heavier this time, although the trestles could all be in a straight line as it was just the flat bottom that was resting on them. Thanks guys, but I will need considerable more man-power when the next time comes to lift it off the trestles, but a long way to go yet.


The front wheels and suspension parts are some way off, so on the Friday I spent more time with the donor bike and now the gear linkage, clutch, speedo and tacho cables plus all oil breather pipes electrical connections, are all disconnected ready to drop the engine out. Lots more scrappy bits of paper have been sellotaped in place to remind me what goes where when it all goes back together.


I have ordered from Ebay a 1 ton engine crane which should arrive by this coming Wednesday, so hopefully on Thursday I will have the engine out and on Friday I can do a trial fit in the car, exciting!!!!!

Thursday, 3 October 2013

OH!! THE SUSPENSION

I couldn't wait until the chassis was turned over so I decided to install the rear suspension and drive shaft whilst it was still upside down.

A new tub of grease purchased and grease gun filled, I liberally anointed the UV joint, the swing arm bearing and pins with grease. the UV joint was placed in its housing in the swing arm which the rubber boot held in place. I then lined up the bearing with the nuts welded into the chassis, an 8mm allen key screwed the pins through the nuts and into the bearings, after ensuring that there was an equal gap each end between chassis and swing arm, I screwed in the bolts until tight and then backed off sufficiently to allow the arm to freely move up and down.


The shock absorber was bolted back on to one side, before I slid the drive shaft up into the other side of the swing arm and with a little wriggling it slipped into the end of the UV joint. I apologise for not taking any photos of the process, but my hands were a bit greasy at the time.


The final job was to offer up the drive box to the swing arm, again the sliding sleeve and the splines were well greased and it slipped together quite easily. I remembered to push the axle rod through the end of the swing arm and into the drive box before I fully tightened the four bolts that secured it all together, this was to ensure that everything was correctly lined up. The other shock absorber was fitted between the drive box and the chassis, a quick clean up and the job was done, just need to paint the hub of the rear wheel and get the correct flat profile tyre fitted.


Friday, 20 September 2013

DOWN TO THE NUTS AND BOLTS

Not able to do anything more to the car until the chassis is flipped over, in the the meantime I did a bit more stripping of the donor Moto Guzzi.

Off came the petrol tank, after draining out the fuel, in the photo you can just make out the masking tape tab attached to a wire, with the legend 'Petrol Warning Light', the first of many such labels that will be attached as the wiring loom is eventually removed. The exhaust down pipes, followed by the air filter box and battery tray were then removed, the carburetters were next, but the throttle and choke cables took a bit of thought before they could be released from the handlebar control, got there in the end with out having to resort to wire snips.


I was puzzling about how I would eventually remove the engine and gearbox from the frame, the workshop manual says that a supporting cradle is attached to the engine, the frame and front wheel is then lifted and rolled forward, up and over the engine. I can now at least see where all the engine mounting positions are and as I don't have a cradle I intend to to use an engine crane to suspend the engine whilst I remove the bolts and then hopefully lower the engine to the ground, we shall see!!!

Monday, 16 September 2013

A RIVETING EXPIERENCE

Last week I eventually got the last 120 holes drilled in the base plate and over this weekend I cleaned up the holes with my old 10mm drill bit, both sides of the base plate plus the the chassis, 720 holes to be precise. the photo shows half of the chassis holes cleaned up and swarf removed, back breaking and shoulder numbing manual work, but it had to be done.


OK Monday, set aside for riveting, but what a day!! the first thing to go wrong was that, try as I might, I could hardly squeeze the bonding/sealing mastic out of the tube, by the time I had covered about twelve inches, my hand and forearms where aching even though I was squeezing the mastic gun double handed, I hoped that reason was, that because it had been quite cold over night, the mastic had thickened and my solution was to dunk the tube of mastic in very hot water for half an hour, It did the trick. It was a messy job and hoping to get two nice equal beads of mastic either side of the rivet holes went out of the window. One large bead was erratically applied which Jacquie helped to spread liberally over the chassis rails.

The base plate was lowered and loosely bolted down. With a bit of adjustment to the plate Jacquie started placing the rivets and I followed around with rivet gun which made a very satisfying sound as the big rivets where banged down. Excess mastic oozed out of the joints and got stuck on everything, so whilst I riveted Jacquie cleaned up with liberal quantities of white spirit and paper cleaning cloths.


I was on a role when half way through, the tip of the riveting nozzle disappeared inside the barrel, the tip had sheared off. I checked the air pressure and it was within limit, I was to put in frankly 'buggered'. I tried my hand pop riveter and manged to pull a few home, but no way was I going to be able to pull a hundred odd rivets that way.


Fortunately Machine Mart is only a five minute drive away and I soon returned with what looked like an identical gun although the nozzle had a slightly different profile and this one was shiny red, the only downside that it was twice the price at £60 from the Ebay one. Job was soon completed and all surplus mastic cleaned away. Time and more riveting will prove that buying cheap was a false economy this time.


At the weekend some chums are visiting and I hope to persuade the male halves to turn her right side up, in the meantime I will endeavour to get a refund on the defunct gun,